2. Installation
System requirements
In order to run Modelur, you will need:
- SketchUp 2017 or above,
- Internet Explorer 10 or above (Windows) / Safari 5 or above (OS X).
Modelur works well with both, Make (free) and Pro (commercial) versions of SketchUp.
Installation
There are several ways you can install Modelur:
- Using universal RBZ installer.
- Via Extension Warehouse.
- Via SketchUcation Plugin Store.
Note
We recommend you to use option #1 (universal RBZ installer) in order to ensure you install the latest version of Modelur.
To install a SketchUp Ruby plugin in RBZ format use the standard SketchUp installation procedure:
- We recommend logging into your computer as an admin before installing any Ruby scripts. This will make the installation go more smoothly and ensure that files get installed in the proper places.
- SketchUp 2016 and below: Select Window → Preferences (Windows) or SketchUp → Preferences (OS X).
SketchUp 2017 and above: Select Window → Extension Manager (Windows) or SketchUp → Extension Manager (OS X). The Preferences dialog box is displayed.- Click on Extensions. The Extensions panel is displayed.
- Click on the Install Extension button. The Open dialog box is displayed.
- Locate the Ruby zip file to install (.rbz).
- Click on the Open button. The Ruby plugin appears in the list of extensions.
Modelur Location
Upon installation, Modelur is saved to Sketchup's default Plugins folder, which resides at different locations, depending on the version of SketchUp you use:
- On Windows:
C:\Users\YOUR USERNAME\AppData\Roaming\SketchUp\SketchUp ####\SketchUp\Plugins\ - On OS X:
~/Library/Application Support/SketchUp ####/SketchUp/Plugins/
Preferences Location
Files containing your Modelur preferences are stored
- On Windows:
C:\Users\YOUR USERNAME\AppData\Roaming\Modelur - On OS X:
~/Library/Application Support/Modelur
All preferences are stored using standard JSON data-interchange format. Upon Modelur upgrade, these files will be automatically updated. In case you edit them manually and something doesn't work, you can always restore them using the command available via SketchUp's menu Extensions → Modelur → Restore default settings.
Installation problems
If you encounter any problems with your Modelur installation, please do the following:
On Windows:
- Delete \Modelur folder and modelur.rb file from
C:\Users\YOUR USERNAME\AppData\Roaming\SketchUp\SketchUp ####\SketchUp\Plugins\. - Delete \Modelur folder from
C:\Users\YOUR USERNAME\AppData\Roaming\(if it exists). - Install the newest RBZ version of Modelur and try to license it (make sure you are online).
On OS X:
- Delete \Modelur folder and modelur.rb file from
~/Library/Application Support/SketchUp ####/SketchUp/Plugins/. - Delete \Modelur folder from
~/Library/Application Support/Modelur/(if it exists). - Install the newest RBZ version of Modelur and try to license it (make sure you are online).
Licensing
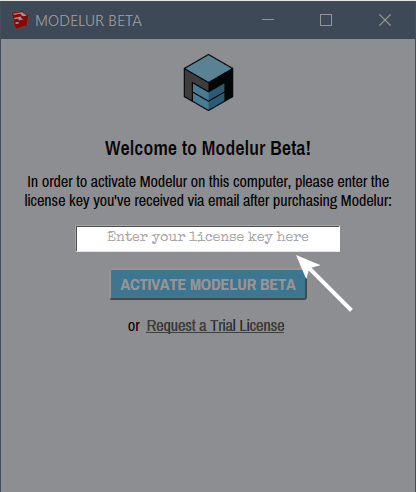
Upon purchase, you should have received a License Key. To license your copy of Modelur, please make sure you are online. You need to copy/paste received License Key into activation window, which opens automatically when you first initialize Modelur (Figure 2.01).
In case you are not able to obtain your License Key or if you experience any other problem, please contact us at support@modelur.com.
Installation on multi-user computer
Should you need to install Modelur on one computer with multiple users, you can use the same license for all of them. To make licensing process more simple, you should take advantage of SketchUp's built-in system of shipped extensions, which installs default extensions that come with SketchUp for every user.
On Windows, the default extensions are stored in C:\Program Files\SketchUp\SketchUp ####\ShippedExtensions\.
Extract Modelur.RBZ to that location (you should see Modelur.rb and \Modelur folder
in the root of \ShippedExtensions folder). This way SketchUp will copy Modelur
installation for every user of the computer when it is initialized.
By default, Modelur will check it's license in C:\Users\YOUR USERNAME\AppData\Roaming\,
meaning that each user will need separate license. But you can tell it to look
for the license in specific location, let's say in C:\Users\ so that the same
license is visible to all users. In order to let Modelur know where to look for
license file, you need to update the file local.json, where you need to add
"licpath": "C:/Users/" entry. This tells Modelur to look for license file in
C:/Users/. To finish automatic setting of licpath, make sure you have local.json
stored in C:\Program Files\SketchUp\SketchUp ####\ShippedExtensions\Modelur\user
as SketchUp will copy its content to every user's AppData folder. And of course
make sure you have Modelur.lic in C:\Users\ folder.
For your reference, this is how local.json might look like on Windows:
{
  "last_news": 0,
  "licpath": "C:/Users"
}
Updating License
Once you renew your Modelur license, you need to update it in case the License Key is different from the one you used before.
In case you encounter some problems when trying to update the license using SketchUp Extensions > Modelur > Update Modelur License or Modelur can't do it automatically (if it is the same Key as before), please do the following:
On Windows:
- Delete modelur.lic file from
C:\Users\YOUR USERNAME\AppData\Roaming\Modelur\folder. - Restart SketchUp and initialize Modelur. It will ask you for your License Key.
On OS X:
- Delete modelur.lic file from
~/Library/Application Support/Modelur/folder. - Restart SketchUp and initialize Modelur. It will ask you for your License Key.
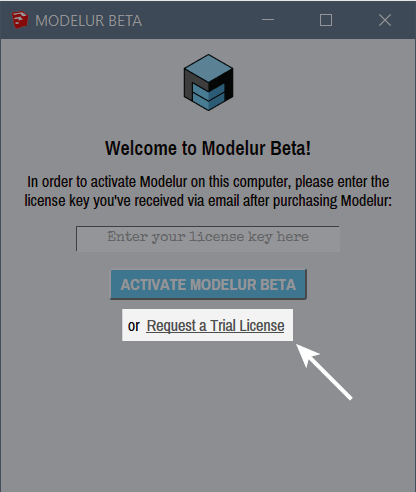
Trial License
You can request free Trial License directly inside Modelur. To do so, install and initialize Modelur. Once activation window is shown, please click on a Request a Trial License link as shown below (Figure 2.02).